
Last Updated: November 13, 2026
Quick Summary
Choosing solar inverters for panel upgrades means matching the new array to the inverter’s DC input ceiling, voltage window and MPPT current limits, not just its AC output. Gather your legacy system data first, then confirm cold-weather voltage and current ratings before comparing models. A slightly oversized array is normal, but a hybrid unit is the default choice if storage may follow.
- Read the inverter’s maximum DC input rating, not only its AC output figure.
- Check string open-circuit voltage at the coldest expected temperature, not at standard test conditions.
- Panels on different roof planes or orientations should generally sit on their own MPPT input.
- Confirm the inverter is on the Clean Energy Council approved list before comparing prices.
- Get written distributor approval before installation, since swapping models afterwards can void it.
Table of Contents
- Mistake 1: Assuming Your Old Inverter Can Handle New Panels
- Solar Inverter Sizing: Getting the Panel-to-Inverter Ratio Right
- Solar Panel and Inverter Compatibility Checks Before You Buy
- Step 1: Gather the legacy system data before requesting a quote
- Step 2: Match voltage windows at the coldest expected temperature
- Step 3: Check current ratings against the MPPT inputs
- Step 4: Confirm connector families and communication protocols
- Step 5: Inspect the balance of system, not just the inverter
- Adding Panels to an Existing Solar System: What Changes
- String, Micro or Hybrid: Which Inverter Type Suits Your Upgrade
- Hybrid Inverter for Battery Readiness and Future Storage
- Australian Approvals, Export Limits and Safe Removal of the Old Unit
- Book a GridFree Solar Upgrade Assessment
- Frequently Asked Questions
Mistake 1: Assuming Your Old Inverter Can Handle New Panels
The most expensive mistake in any panel upgrade is assuming your existing inverter can absorb the extra capacity. In most cases it cannot, due to hard electrical limits rather than age. This guide covers the errors homeowners most often make when choosing solar inverters for panel upgrades, and how to avoid each one.
Why legacy inverters often hit their DC input ceiling
Every inverter has a maximum DC input rating, and older units were sized tightly to the array they shipped with. Add panels without checking that ceiling and the inverter clips production, derates in heat, or refuses to start. A common mistake is reading only the AC output figure and ignoring the DC input limit.
Voltage range and MPPT limits that catch homeowners out
String voltage rises as you add panels in series. Exceed the inverter’s maximum input voltage and you risk damaging it; stay below start-up voltage and it won’t wake up. MPPT inputs also have current ceilings, so a second string on a shared tracker can drag the whole array down. For keep-or-replace criteria, see our guide on how to choose the right solar inverter for Australian homes.
Solar Inverter Sizing: Getting the Panel-to-Inverter Ratio Right
Solar inverter sizing matches array peak power to inverter capacity so the system produces steadily rather than clipping at midday. The panel-to-inverter ratio is the array’s peak DC power divided by the inverter’s AC output.
Why oversizing panels against inverter capacity can work in your favour
A degree of oversizing is normal and often sensible. Panels rarely hit nameplate output once heat, soiling and angle are factored in, so a slightly larger array keeps the inverter busy through shoulder periods. Push the ratio too far and you lose generation to clipping. Undersizing the inverter to save money is a false economy: you pay for panels that can never deliver their full output.
| Scenario | What it means in practice | Risk level |
|---|---|---|
| Array well below inverter capacity | Inverter runs light, rarely near peak | Low output, wasted headroom |
| Balanced ratio | Steady generation, minimal clipping | Low |
| Heavily oversized array | Midday clipping, heat stress on unit | Medium to high |
Solar Panel and Inverter Compatibility Checks Before You Buy
Solar panel and inverter compatibility comes down to four numbers: voltage window, current rating, connector type and communication protocol. Get any one wrong and a perfectly good inverter becomes the wrong inverter. For an upgrade, the hard part is assembling the legacy system data the comparison depends on. This section sets out the checks in the order an installer would run them. Once the legacy system’s electrical limits are clear, the same load assessment can show whether a 200 amp panel upgrade is needed to support the inverter and the rest of the home.
Step 1: Gather the legacy system data before requesting a quote
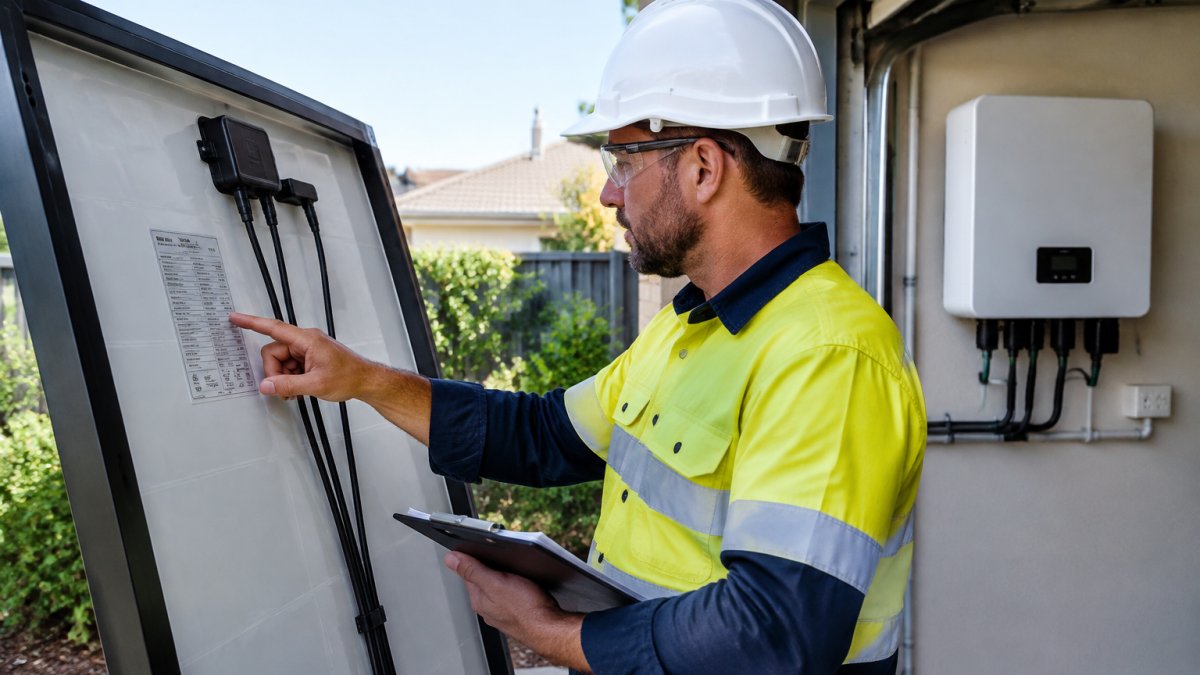
Before you can compare inverters, you need the existing array’s electrical fingerprint. Collect the following and have it ready for every quote:
- Panel nameplate values from the module label: maximum power (W), open-circuit voltage (Voc), short-circuit current (Isc), maximum power voltage (Vmp) and maximum power current (Imp). If faded, the model number usually suffices for the datasheet.
- String configuration: panels per string, number of strings, and which roof plane each sits on. A photo of the array layout and combiner box labelling helps.
- Existing inverter details: make, model, serial number, maximum DC input voltage, MPPT voltage window, start-up voltage, maximum input current per MPPT, AC output rating and firmware version.
Missing or mismatched legacy data is the single biggest cause of quote revisions and delayed installs. A common pattern: a homeowner quotes three inverters against a guessed panel count, then discovers the strings cannot be reconfigured without re-cabling.
Step 2: Match voltage windows at the coldest expected temperature
Start with the array’s open-circuit voltage at the coldest expected temperature, not at standard test conditions.
At the other end, check the start-up voltage. If the reconfigured string cannot reach the inverter’s start-up threshold early in the morning, the unit simply will not wake up and you lose the shoulder generation that makes oversizing worthwhile.
Step 3: Check current ratings against the MPPT inputs
Next, check short-circuit current against the MPPT input rating, and maximum power current against the MPPT’s usable current. Modern high-current panels can exceed the per-MPPT ceiling of an older or smaller inverter, forcing a different inverter or string layout.
Legacy panels with lower current ratings can also underperform on a modern high-current inverter, because the MPPT window is optimised for a current band the old panels cannot reach.
Step 4: Confirm connector families and communication protocols
Confirm connector compatibility, since mixing connector families voids warranties and creates a genuine safety issue. Connector types are not interchangeable even when they look similar, and a mismatched pair is a known failure and fire risk.
Communication protocol matters more than most buyers expect. If you want the new inverter to talk to existing monitoring, a smart meter or a future battery, check supported protocols and whether the manufacturer’s platform accepts the legacy hardware.
Step 5: Inspect the balance of system, not just the inverter
Compatibility is not only panel-to-inverter. The DC isolator, cabling, earthing and enclosure must suit the new unit’s ratings and the expanded array.
If you are weighing up whether to keep or replace the existing unit, our guide on how to choose the right solar inverter for Australian homes sets out the decision criteria in full.
Adding Panels to an Existing Solar System: What Changes
Adding panels to an existing solar system changes more than the panel count. String configuration, roof layout and shading all shift once new modules join the array, and the inverter has to make sense of the new picture.
Roof orientation, shading and string configuration after expansion
Panels on a different roof plane or facing a different direction should generally sit on their own MPPT input. Mixing orientations on one string means the weakest panel sets the pace. Afternoon shade on a new section can drag down an otherwise healthy array unless strings are separated properly. This is where a cheap expansion turns into a mediocre system.
String, Micro or Hybrid: Which Inverter Type Suits Your Upgrade
The right inverter type depends on your roof, your shading and whether storage is on the horizon. Here is how the three main categories compare for an upgrade rather than a new build.
| Type | Best for upgrades when | Main drawback |
|---|---|---|
| String inverter | Roof is unshaded and panels share one plane | One shaded panel affects the string |
| Microinverter | Roof is complex, shaded or multi-directional | Higher upfront cost per panel |
| Hybrid inverter | Battery storage is planned now or later | Costs more than a standard string unit |
Pros and cons of each type relative to panel upgrades
String inverters are the cheapest path and suit a clean, single-plane roof, but they limit how creatively you can add panels later. Microinverters handle shading and mixed orientations well and make panel-level expansion simple, at higher cost. For a direct comparison, see our breakdown of solar inverter vs microinverter performance and the differences between microinverters and power optimizers.
Hybrid Inverter for Battery Readiness and Future Storage
A hybrid inverter for battery readiness lets you add storage later without replacing the inverter again, saving a second installation round. That is why we treat it as the default choice for most upgrades.
Check that the hybrid unit supports the battery chemistry and voltage range you are likely to buy, and that it carries the certifications your network operator expects. Our checklist on upgrading your solar inverter for a battery covers what to verify before signing, and our solar battery compatibility guide explains how to confirm the pairing will actually work.
Australian Approvals, Export Limits and Safe Removal of the Old Unit
Approvals and export limits are where DIY plans fall apart. Grid connection changes usually need approval from your electricity distributor. Inverter models should appear on the Clean Energy Council’s approved list to be eligible for small-scale certificates, per Standards Australia.
What most upgrade guides omit is the order these steps happen in, and what each one actually requires of you. Here is the practical sequence.
The upgrade approval sequence, in order
- Confirm the proposed inverter is on the Clean Energy Council approved list. If not, you lose eligibility for small-scale certificates and the financial case changes. Check before comparing prices.
- Lodge the grid connection application with your distributor. The distributor, not the retailer or installer, assesses whether the local network can accept the proposed generation and export. Applications typically need the inverter model, export limit setting, array capacity and single-line diagram.
- Obtain written approval before installation. Installing first is a common cause of delayed commissioning and, sometimes, a requirement to remove or re-limit the system.
- Install to AS/NZS 5033 and AS/NZS 4777.2, with the inverter configured to the approved export limit and settings documented.
- Commission and lodge the paperwork, including the Certificate of Electrical Safety and small-scale certificate documentation where eligible.
Watch out: the distributor’s approval covers the specific inverter model and export setting you applied for, so swapping models after approval can void it and force a fresh application.
How export limits are set, and why they vary
Export limits are set by the distributor according to local network capacity, and they vary by area and by the size of the generation proposed.
If the proposed upgrade would exceed the cap, the options are usually to accept a lower export limit, apply for a higher one where the distributor allows it, or add storage so excess generation is used on site rather than exported.
Safe isolation and removal of the old inverter
Removal of the old unit is not a bin job. Inverters contain capacitors and hazardous components, so de-energising, isolating and disposing of them should be handled by a licensed electrician under state waste rules. The practical steps are:
- Isolate and prove dead at the DC and AC sides before any disconnection, following the installer’s safe isolation procedure.
- Document the removal with photos of the existing wiring, isolator ratings and labelling, so the new installation can be verified against what was there.
- Retain the old inverter’s documentation, serial number, firmware version and warranty terms, because warranty claims and future service records may depend on it.
The Clean Energy Council publishes the accredited installer framework, and your installer should be able to confirm the disposal route they use.
What to get in writing before sign-off
Before the job is closed out, ask for the approved export limit setting, the inverter configuration record, the Certificate of Electrical Safety, and confirmation that the balance of system was inspected and passed. Reusing old wiring without an inspection is one of the most common causes of failed inspections, and the paperwork is your evidence that it was checked.
Book a GridFree Solar Upgrade Assessment
Most inverter upgrade mistakes trace back to one habit: deciding on the hardware before checking what the existing system can actually support.
GridFree Solar provides expert solar panel and battery storage installation, with CEC accredited installers, rebate guidance and compliance with AS/NZS 5139:2019 and AS/NZS 3000. Contact GridFree Solar to discuss an assessment of your existing system.
Frequently Asked Questions
Do I need to replace my solar inverter when upgrading my panels?
Not always, but often. If your existing inverter’s DC input voltage range and maximum input current can absorb the extra panels, you may keep it. The catch is age: most inverters last 10 to 15 years, so replacing one that is already eight years old during a panel upgrade avoids paying installation labour twice. A licensed installer should check the nameplate ratings and MPPT limits before you decide.
Can I add more panels to my existing solar inverter?
Only within the inverter’s rated DC input window. Adding panels to an existing solar system pushes up string voltage and current, and exceeding either limit can damage the unit or void its warranty. Check the maximum DC input power, the MPPT voltage range and the maximum input current per MPPT. If the new array overshoots any of these, a larger inverter or a separate microinverter branch is the safer route.
Is a hybrid inverter for battery readiness worth it when upgrading panels?
If you plan to add storage within the next few years, yes. A hybrid inverter for battery readiness combines solar conversion and battery charging in one unit, so you avoid buying and installing a second inverter later. It also lets you take advantage of battery rebate programs when you are ready. If storage is unlikely, a standard string inverter usually costs less upfront.
What should I check before replacing a solar inverter?
Confirm the new unit is on the Clean Energy Council’s approved inverter list, matches your panel array’s voltage and current, and is compatible with your switchboard and export limit. Ask the installer for a Certificate of Electrical Safety and confirm they hold CEC accreditation. Also plan the safe de-energising and disposal of the old inverter, which contains capacitors that must be handled by a licensed electrician.
