Last Updated: October 29, 2026
Quick Summary
A solar panel safety inspection checks the physical condition, wiring and electrical components of your system so small faults do not become fires, shocks or lost power. Start with visual checks from the ground every few months, then arrange a licensed professional inspection for anything electrical.
- Check panels, mounting hardware and visible cables from the ground using binoculars and a torch.
- Never open the inverter, switchboard or meter box yourself; leave internal work to a licensed electrician.
- Rooftop DC wiring stays live during daylight even when the inverter is switched off.
- Burning smells, scorch marks or persistent error codes mean stop, do not reset repeatedly, and call a professional.
- Keep a dated inspection log with photos to support warranty claims, insurance and service calls.
Table of Contents
- Why a Solar Panel Safety Inspection Matters for Your Home
- What You Can Check Safely From the Ground
- Solar Panel Maintenance Checklist for Visible Damage
- Solar Inverter Warning Signs and Immediate Response
- How Often Should Solar Panels Be Inspected?
- What to Record After Storms and Physical Damage
- Building a Solar Inspection Report Template You Can Reuse
- Frequently Asked Questions
Why a Solar Panel Safety Inspection Matters for Your Home
A solar panel safety inspection checks the physical condition, wiring and electrical components of your system so that small faults do not become fires, shocks or failed power. These hidden thermal risks often mirror the broader hazards posed by outdated home wiring that can compromise the integrity of your entire electrical infrastructure.
The issues that cause trouble in solar systems are usually visible long before they fail. A regular check, paired with the right knowledge of what to look for, gives you a clear picture of whether your system is still safe. You can learn practical safe monitoring checks and seasonal routines for your system.
This checklist covers what a homeowner can safely look for, what needs a licensed professional, and how to keep records. Some of the most important safety work, including anything inside the switchboard, must be left to a qualified electrician. Knowing where that line sits is the first step.
What You Can Check Safely From the Ground
Start with the checks you can do from the ground, using binoculars and a torch rather than a ladder. You do not need to touch the system to learn a great deal about it.
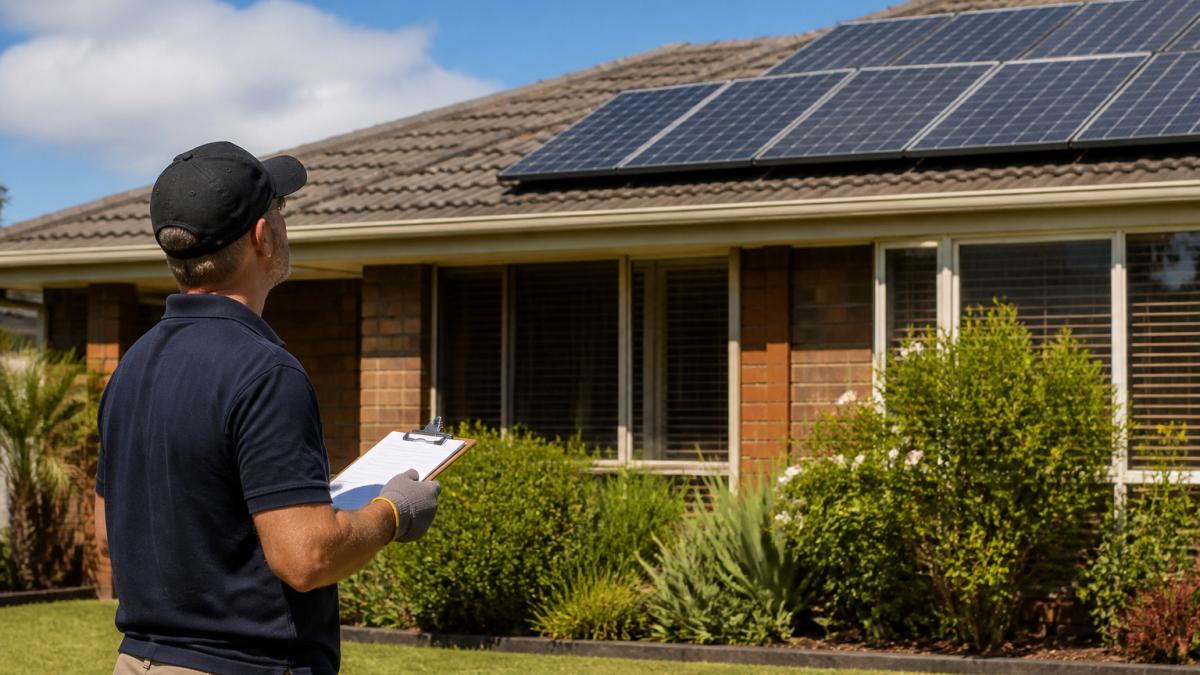
Look at the panels from the footpath or back yard. Note any cracks in the glass, chips, dark or burnt patches, or areas where the surface looks bubbled or discoloured.
Next, look at the cabling where it runs down the wall or into the roof space. Look for cables that are sagging, rubbed raw, chewed by animals, or sitting in direct sunlight without protection.
Watch out: never open the switchboard, inverter or meter box yourself. Leave all internal work to a licensed electrician.
Finally, check your monitoring app or inverter display. A sudden drop in output, a fault code or a system that keeps shutting down are signs that something needs attention, even if nothing looks wrong from the ground.
Solar Panel Maintenance Checklist for Visible Damage
A regular solar panel maintenance checklist keeps the visible condition of your system in view. The critical distinction most guides skip is what you can safely check yourself versus what must be left to a licensed professional. Work through the homeowner-safe items below every few months, and after any severe weather.
Homeowner-safe checks (from the ground, no touching electrical components):
- Panel glass: use binoculars to check for cracks, chips, dark patches and discolouration
- Panel frames: look for bent, lifted or corroded edges
- Mounting hardware: check that rails, clamps and brackets appear tight and free of visible rust
- Roof flashing: confirm it sits flat with no gaps or lifted edges
- Roof tiles or sheeting near the array: look for broken or displaced pieces
- Cables: check for fraying, cracking, loose clips and animal damage where visible from ground level
- Debris and nesting: remove leaves and bird nests only where you can do so safely from the ground with a long-handled tool
- Monitoring data: confirm output is consistent with recent days
Checks that require a licensed electrician or accredited installer:
- Any work inside the inverter, switchboard or meter box
- Testing voltage, current or insulation resistance on DC or AC circuits
- Tightening or replacing mounting hardware on the roof
- Inspecting or repairing wiring in the roof space or behind panels
- Assessing whether a cracked panel is still electrically safe
Never open the inverter, switchboard or meter box yourself. Rooftop DC wiring remains live during daylight even when the inverter is switched off (Safely installing photovoltaic (PV) systems). Only a licensed electrician should isolate or test any part of the system.
Cleaning matters too, but do it carefully. For full output, read our guide on how to clean solar panels safely. Use water and a soft brush from the ground or a secure, properly rated platform, and never use a pressure washer on the panels or their wiring. If a panel is cracked or the wiring is damaged, do not clean it with water until a professional has assessed it.
Keep this checklist in your records. Comparing it against the previous check shows you how quickly a problem is developing, and the homeowner-safe versus professional split helps you describe the issue accurately when you call for help.
Solar Inverter Warning Signs and Immediate Response
The inverter converts the direct current from your panels into the alternating current your home uses. Treat its warning signs seriously.
Watch for these warning signs:
- A burning smell, scorch marks or discolouration on the inverter casing
- Crackling, buzzing or hissing that was not there before
- Warning lights or error codes that persist or repeat
- Repeated tripping, restarting or shutdowns
- A sudden and sustained drop in generation with no obvious shading or weather cause
If you notice any of these, act in this order. First, do not touch the inverter or any exposed wiring. Second, if you see smoke, sparks or a strong burning smell, isolate the system at the main switch or switchboard only if this is safe for you to reach, and call emergency services if there is a fire. Third, contact a licensed installer or electrician to inspect the system before it is used again.
Repeated faults should never be ignored or reset over and over. Each restart can stress components that are already failing. Keep a note of the error codes and times, as this helps the technician diagnose the fault faster.
The table below summarises the inverter warning signs and the order in which to respond to them.
| Warning sign | Immediate response | Follow-up |
|---|---|---|
| Burning smell or scorch marks | Do not touch the inverter or wiring | Isolate at the main switch if safe; call emergency services for fire |
| Crackling, buzzing or hissing | Do not touch the inverter or wiring | Contact a licensed installer before reuse |
| Persistent warning lights or error codes | Do not reset repeatedly | Note codes and times for the technician |
| Repeated tripping or shutdowns | Stop restarting the system | Each restart can stress failing components |
| Sudden sustained drop in generation | Check for shading or weather causes | Book a professional inspection if none found |
How Often Should Solar Panels Be Inspected?
A simple visual check every few months is a sensible routine, and a professional inspection at a frequency suited to your system is worth arranging. Many homeowners use the change of season as a reminder.
The right interval depends on your system and your location. A home in a coastal area with salt spray, a property with heavy tree cover, or a roof exposed to hail may need more frequent attention.
Inspection timing after severe weather or damage:
- After hail: check for cracked glass, dented frames and displaced panels from the ground
- After high wind: look for lifted panels, loose flashing and debris on the array
- After lightning: note any inverter fault codes or tripped safety switches
- After fire: do not approach the system until emergency services declare it safe; ash and heat can damage components
- After a roof leak: check for water staining near the inverter and cable entry points
A professional inspection should check the electrical connections, grounding, inverter performance and any battery storage, not just the panels. Ask your installer which standards they follow and keep that information with your records.
Documentation for warranties, insurers and service calls:
Keep a simple log that records the date of each inspection, who carried it out, what was found, and any photos taken. This record supports warranty claims, helps your insurer assess storm damage, and gives a technician a clear history when you book a service call.
Set a calendar reminder for the first weekend of each season to do your ground-level check, and note the date in your log. This simple habit catches most visible problems before they become expensive.
What to Record After Storms and Physical Damage
After a storm, hail event or any impact to the roof, record the damage before doing anything else. Photos are the most useful evidence, so take them from several angles and include the date and time.
Note the following in your log:
- The date and type of event, such as wind, hail or falling branches
- Photos of any visible panel, frame, cable or roof damage
- Changes in inverter status, error codes or output in the days that follow
- Any work carried out and by whom
These records are valuable when you contact your insurer, lodge a warranty claim or book a service call. They also help a technician work out what happened and whether the damage is likely to be progressive.
Do not attempt to repair storm damage yourself. A panel that has been struck or a roof that has been compromised may be unsafe, and any warranty may depend on work being carried out by an accredited installer.
Building a Solar Inspection Report Template You Can Reuse
A simple, reusable template turns your checks into a useful history. Set up a single page or spreadsheet with the same fields each time you inspect.
Include these fields:
- Date of inspection and who carried it out
- Weather conditions and any recent storm events
- Panel condition: cracks, chips, discolouration, cleanliness
- Mounting and roof condition: hardware, flashing, tiles
- Cable condition: fraying, loose clips, animal damage
- Inverter status: lights, codes, noises, output
- Monitoring data: average output compared with last inspection
- Photos attached and filed by date
- Actions taken and the next scheduled check
Keep the template and all completed records in one folder, digital or paper. When you book a professional inspection, hand over the log. A technician who can see the history of your system will diagnose problems faster, and the record will support any warranty, insurance or service claim you need to make later.
If you would like help setting up a schedule or reviewing your system’s condition, the team at GridFree Solar can talk you through the options. You can also check our solar battery maintenance checklist for a routine that covers your storage as well as your panels, and our residential battery safety guide if you spot a warning sign on your inverter.
Frequently Asked Questions
Can homeowners inspect solar panels themselves?
Yes, you can carry out a visual check from the ground: look for cracked or chipped glass, discolouration, loose or damaged cabling, and obvious debris. Anything that involves opening enclosures, testing live circuits, working on the roof or touching the inverter’s internal components should be left to a licensed electrician. A qualified installer or electrician can confirm the system still meets the relevant standards after any repairs.
When should I call a licensed electrician to inspect my solar system?
Call a licensed electrician straight away if you notice a burning smell, scorch marks on connectors, electrical arcing or sparks, or equipment that keeps tripping. Call them too if the inverter shows persistent fault codes, if output drops noticeably without an obvious cause, or after any storm or impact that may have damaged the array or cabling. Do not keep operating a system that shows these signs, and switch off the isolator if it is safe to reach.
What should a professional solar inspection report include?
A professional report should list the panels, inverter and any battery inspected, with the condition of each module, mounting hardware, roof penetrations, wiring and connections. It should record electrical test results where relevant, note any faults or hazards with photos, and set out recommended repairs and their priority. Keep the report with your warranty documents, as insurers and service providers may ask for it after a claim or repair.
How often should a home solar system be inspected?
A visual check by the homeowner every few months is a sensible routine, and a professional inspection is generally advisable at least once a year, with extra checks after severe weather. Monitoring data gives an early signal: if your system’s output drops compared with the same period in previous months, arrange an inspection. Schedule a professional review sooner if any warning signs appear.
