
Last Updated: November 4, 2026
Quick Summary
Match your solar panel mounting bracket to the surface and panel frame before drilling, then fix brackets into structural framing rather than cladding or tile. Use stainless steel fasteners with washers, seal every penetration, and keep the array within the bracket and panel load ratings.
- Z-brackets suit small arrays on solid roofs, while rails and clamps spread load better for larger arrays.
- Fix brackets to rafters, purlins or ribs, never to the flat pan of metal sheet alone.
- Use stainless steel fasteners in coastal areas because zinc-plated screws corrode quickly in salt air.
- Apply sealant in the hole and around the bracket base, and use flashings where water can pool.
- Electrical work and battery systems must be handled by a licensed electrician under AS/NZS 3000 and AS/NZS 5139.
Table of Contents
- Choosing the Right Solar Panel Mounting Bracket for Your Surface
- Your Solar Panel Installation Tools List Before You Start
- Planning the Mounting Location, Orientation and Air Gap
- Fasteners, Substrate Checks and Load Limits That Decide the Job
- Step-by-Step: Marking, Drilling and Fastening the Brackets
- Best Solar Roof Mounting Systems and When to Choose Each
- Solar Panel Mounting Regulations Australia Homeowners Must Know
- When to Hand the Mounting Job to a CEC-Accredited Installer
- Frequently Asked Questions
Choosing the Right Solar Panel Mounting Bracket for Your Surface
DIY solar panel mounting bracket installation tips start with one decision: which bracket suits your surface. Get that wrong and no amount of careful drilling will save the job. Mismatched hardware is one of the most common causes of failed DIY mounts. This guide covers bracket choice, fasteners, sealing and the rules that apply here. Proper material selection becomes even more critical when installing solar on roofs with specialized membranes like EPDM, where the integrity of the seal determines the longevity of the entire array.
Bracket Types: Z-Brackets, Rails and Clamps Explained
A solar panel mounting bracket is a metal fixing that connects a panel to a roof, wall, ground frame or vehicle surface. Three types do most of the work:
- Z-brackets bolt straight to the panel frame and the roof. Best for small arrays on solid surfaces.
- Mounting rails run across the roof, and panel clamps grip the panel edges onto them. Best for larger arrays.
- Panel clamps hold panels to rails and set the spacing between them.
Z-brackets are generally quicker to fit on small jobs, while rails spread load better and allow spacing adjustment. For larger arrays, rails are usually the more suitable choice.
Matching Brackets to Panel Dimensions and Mounting Surface
Check three things before you buy: panel dimensions, frame thickness and surface type.
Measure the panel length and width, then confirm the bracket fits the frame lip. A bracket that clamps too loosely will work loose in wind. Match the bracket to the surface too:
- Tiled roof: tile hooks or brackets that slip under the tile.
- Metal roof: brackets fixed to the ribs or purlins, never just the sheet.
- Ground mount: posts set in concrete with adjustable rails.
- Vehicle or off-grid setup: low-profile brackets or VHB tape for flexible solar panels.
Flexible panels need a flat, clean substrate. Fixed panels need a frame with real fixing points.
Your Solar Panel Installation Tools List Before You Start
A short, honest solar panel installation tools list saves repeat trips up the ladder. Gather everything first:
- Cordless drill with driver bits
- Tape measure and pencil
- Spirit level
- Stud finder or roof framing detector
- Socket set and spanners
- Stainless steel screws, bolts and washers
- Roof sealant rated for outdoor use
- Cable ties and cable clips
- Safety harness, gloves and non-slip boots
- Installation sketch showing bracket positions
Buy stainless fasteners. Zinc screws corrode fast on coastal roofs. A common mistake is buying the cheapest sealant on the shelf. It cracks within a season.
Planning the Mounting Location, Orientation and Air Gap
Panel orientation affects output. In the southern hemisphere, north-facing panels generally give the strongest yearly yield, and east and west splits can suit households with morning and evening demand.
Leaving an air gap between the panel and the roof surface allows airflow, which helps keep panels cooler.
Plan the mounting location around three checks:
- No shade from trees, chimneys or neighbouring roofs between 9am and 3pm.
- Brackets land on roof framing, not just sheet or tile.
- Enough clearance for cleaning and inspection.
Draw an installation sketch before you drill. Mark every bracket position on paper first, with spacing measured from the panel frame.
For a deeper look at tilt and its effect on yield, see our guide to solar panel roof angle efficiency.
Fasteners, Substrate Checks and Load Limits That Decide the Job
Fasteners fail when the substrate behind them is weak, and most DIY failures trace back to a screw that bit into cladding, tile batten or thin sheet rather than structural framing. Before drilling, confirm what is actually behind the fixing point.
Identify the substrate first
- Timber-framed roof: locate rafters or trusses with a stud finder or by tapping and probing. Rafter spacing varies between buildings, so bracket spacing should be planned around the framing actually found on your roof rather than guessed.
- Steel-framed roof: confirm purlin gauge and position. Self-drilling screws suit steel purlins, but a screw that only passes through the sheet will pull out under wind uplift.
- Metal roof sheeting: fix to the purlin or rib fixing, never to the flat pan of the sheet alone.
- Masonry or concrete: use masonry anchors rated for the substrate, and confirm the anchor’s pull-out rating rather than relying on the drill bit size.
Probe timber for rot with a screwdriver before trusting it. Soft or crumbly timber will not hold a screw under cyclic wind load, and no longer screw fixes a rotten rafter.
Size and grade the fastener
- Use screws long enough to bite well into solid framing, measured past any batten, tile or cladding.
- Use washers under every screw head to spread load across the bracket base.
- Use bolts with locking nuts or nyloc nuts for rail systems, and re-check torque after the first thermal cycle.
- Specify stainless steel fasteners in coastal or high-corrosion areas. Zinc-plated screws corrode quickly in salt-laden air, and dissimilar metals in contact accelerate galvanic corrosion.
Verify load limits rather than assuming
Wind uplift pulls panels upward, and vibration loosens anything under-torqued. Check the bracket manufacturer’s rated load and the panel manufacturer’s clamping zone, then stay well under the rated capacity. The bracket rating is not the only limit. The weakest element in the chain, whether the fastener, the substrate, the bracket or the panel frame, determines the real capacity.
Watch out: if you cannot find framing at the planned bracket position, move the bracket rather than bridging the gap with a longer screw. A longer screw through air transfers no load and creates a lever that works the fixing loose.
Where an array is exposed to high wind or snow loading, have the fixing design checked against the site’s wind classification before installation. Mounting is only one part of a safe system, and the electrical work that follows must be done by a licensed electrician.
Step-by-Step: Marking, Drilling and Fastening the Brackets
Set out the job in order and check fit at every stage.
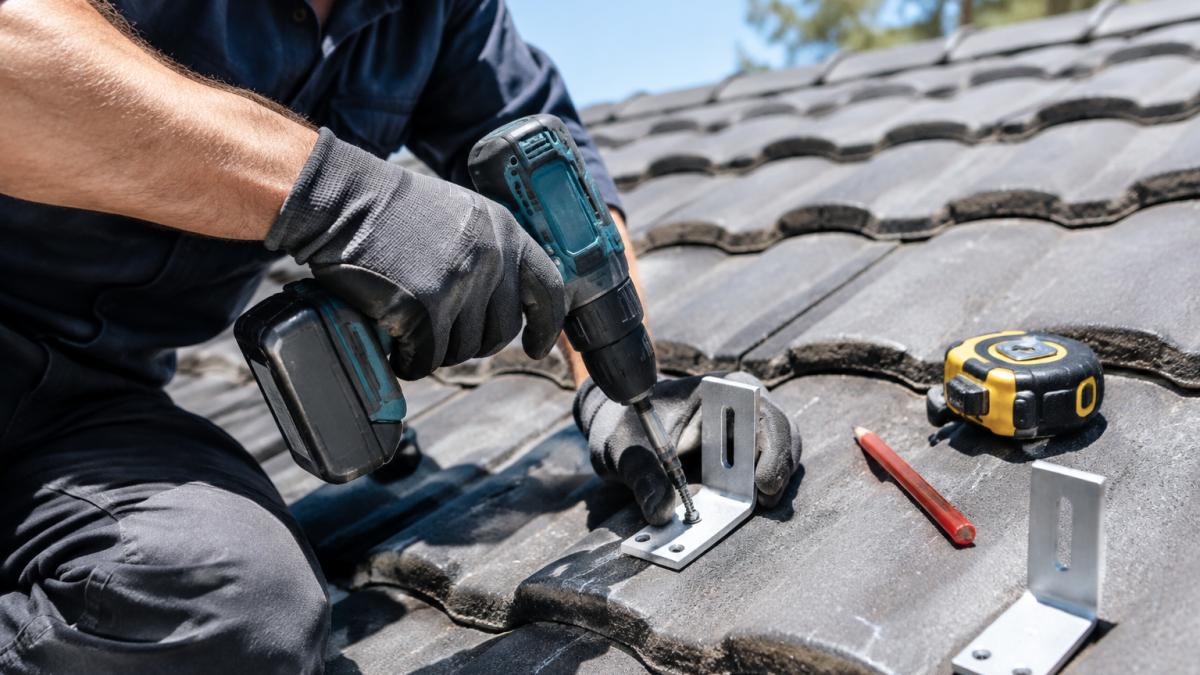
- Mark bracket positions. Measure from the panel frame and mark each point with a pencil. Check alignment with a spirit level.
- Pre-drill pilot holes. Use a bit narrower than the screw.
- Check fit. Hold the bracket in place and confirm the holes line up.
- Apply sealant. Put sealant in the hole and around the bracket base.
- Fasten the bracket. Drive screws firmly but do not over-tighten.
- Mount the panel. Set the panel on the brackets and clamp or bolt it down.
- Check spacing. Confirm even gaps between panels for airflow.
Sealing Penetrations and Preventing Roof Leaks
Every hole in a roof is a future leak if sealed badly. Roof penetration sealing generally involves sealant under the bracket, sealant in the hole, and a flashed attachment where water can pool.
Watch out: skipping the flashings on a low-pitch roof lets water run straight into the screw holes. Our guide to solar panels on metal roof covers mounting and sealing on metal sheeting in detail.
Best Solar Roof Mounting Systems and When to Choose Each
Best solar roof mounting systems depend on roof type and array size. Here is how the main options compare:
| System | Best for | Watch out for |
|---|---|---|
| Z-brackets | 1-3 panels, solid roofs | Weak load spread |
| Rail and clamp | Larger arrays | Higher cost |
| Tile hooks | Tiled roofs | Careful tile handling |
| Ground mount frame | Off-grid setups | Concrete work |
| VHB tape | Flexible panels, vehicles | Surface prep critical |
For most homes, a rail and clamp system gives the best balance of strength and adjustability. Z-brackets suit small jobs where cost matters more than load spread.
Solar Panel Mounting Regulations Australia Homeowners Must Know
Solar panel installations in Australia are governed by a number of standards. Electrical work falls under AS/NZS 3000, and battery systems fall under AS/NZS 5139.
Key points for DIY mounting:
- Arrays should be designed to withstand wind loads for the site.
- Panels need secure fixing to framing, not just cladding.
- Electrical work must be done by a licensed electrician.
- Battery systems fall under AS/NZS 5139.
GridFree Solar is a CEC accredited installer, and our installations are carried out with reference to the relevant standards. For a plain-language breakdown, read our guide to solar panel safety standards.
When to Hand the Mounting Job to a CEC-Accredited Installer
Hiring a CEC-accredited installer makes sense when the job touches anything beyond a simple ground frame. Accreditation shows the installer meets Clean Energy Council requirements.
Hand it over if:
- The roof is steep, fragile or hard to access.
- The array is larger than a couple of panels.
- You need electrical connections or battery storage.
- You want help navigating rebate paperwork.
If you are still weighing the trade-off, our article on DIY solar installation pros and cons sets out the full picture. And if you want to know what accreditation protects, see why a CEC accredited installer matters.
Frequently Asked Questions
Do I need a CEC-accredited installer to mount solar panels?
For the electrical work, yes. Any grid-connected solar system must be designed and installed by a Clean Energy Council accredited installer, and the electrical connection must be signed off with a Certificate of Electrical Safety. Mounting brackets are the structural side, but they are part of the same system, so a DIY bracket job should still be inspected as part of the overall installation. If you want the rebates under the Small-scale Renewable Energy Scheme, the whole installation has to be done by an accredited provider.
How do I make sure my solar panel mounting brackets are wind-rated?
Check the bracket’s rated uplift capacity against the wind region for your site. Coastal or exposed sites generally carry higher uplift loads. Ask the supplier for the bracket’s tested load rating and confirm it exceeds the calculated uplift for your roof height and pitch. Stainless steel fasteners, correct fixing depth into the roof framing, and the right number of brackets per panel all affect how well the array holds in strong wind.
What tools are required for installing solar panel mounting brackets?
A basic solar panel installation tools list includes a cordless drill, a tape measure, a spirit level, a stud finder or roof framing detector, a socket set and a sealant gun. Add safety gear: harness, non-slip boots, gloves and eye protection. A ladder stabiliser helps on tiled roofs, and a magnetic bit holder saves time when you drop screws.
How do I maintain solar panel brackets to prevent corrosion?
Inspect brackets periodically, ideally before the storm season. Look for surface rust, loose fasteners, cracked sealant around penetrations and any movement in the rail or clamp. Rinse salt and dust off coastal installations with fresh water, and re-torque bolts to the manufacturer’s specification if they have worked loose. Replace any fastener showing corrosion rather than painting over it, because a corroded anchor loses holding strength. Keep a written record of inspections so you can show maintenance history if you ever claim on insurance.
Mounting brackets are the cheapest part of a solar job and the one most likely to fail. If you would rather not gamble on wind load, roof leaks and code compliance, talk to GridFree Solar. We install CEC-approved batteries and panels to AS/NZS 5139:2019 and AS/NZS 3000, issue a Certificate of Electrical Safety, and help you claim the rebates you are owed. Get started with GridFree Solar and put your system on a roof that holds.
